Wondering how to tell if your Magic Mouse is taking charge? Look no further. This article demystifies your Magic Mouse’s charging status indicators, providing clear, concise guidance on how to know if your Apple Mouse is charging. We’ll give you the straightforward signs to look for, from visual cues to system alerts, so you’ll instantly know if your mouse is successfully charging. Plus, we’ll touch on some quick troubleshooting tips in case your mouse isn’t responding as expected.
Key Takeaways
- You can check your Magic Mouse’s charging status by observing the LED indicator light, using System Preferences on your Mac, or checking the battery status in the Menu Bar or Control Center.
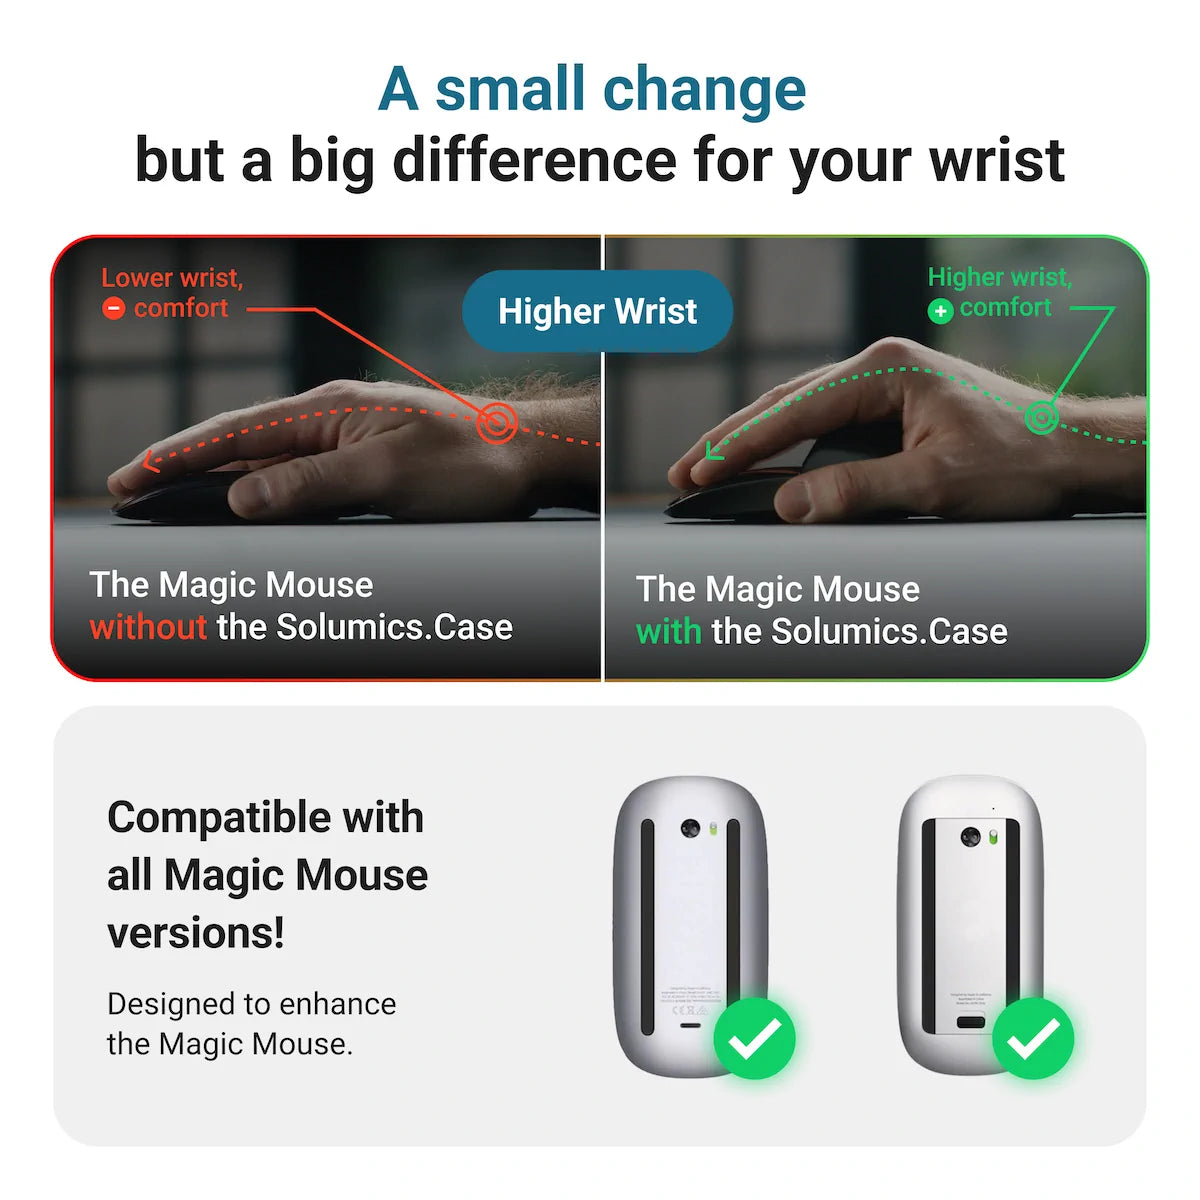
- The Solumics Case is an ergonomic addition for your Magic Mouse that enhances comfort without compromising functionality and is compatible with all versions of the Magic Mouse.
- If your Magic Mouse isn’t charging, ensure you’re using the correct cable and port, avoid extreme temperatures during charging, and consider troubleshooting steps like checking power sources or cleaning the port.
Identifying the Charging Status of Your Magic Mouse
Ever played the guessing game with your Magic Mouse’s charging status? It’s time to clear up the confusion. Your sleek little device is actually quite communicative; it provides feedback through visual indicators and system notifications to keep you in the loop about its battery life. When you plug it in, you might notice some behavioral changes—if it gets a little more responsive, that’s a good sign it’s happily sipping power. And when it’s fully topped up, a handy notification will pop up on your connected Mac to let you know it’s ready to roll.
But you may wonder, how do you monitor your Magic Mouse’s charging progress? Here’s the explanation.
Checking the Connection
First things first: is your Magic Mouse really connected? You’d be surprised how often a charging hiccup is just a case of a loose cable or a bit of grime in the port. Make sure that port is as clean as a whistle; any dirt or debris could be blocking the connection. For detailed instructions on maintaining a clean connection, see our tips on cleaning your Magic Mouse.
If you suspect some gunk, gently give it a clean—just like you would with a precious piece of jewelry. Once you’ve cleared the way and plugged in the USB cable securely, you’re on the right track to get that magic back in your mouse.
Observing Indicator Lights
Now, take a peek near the charging port. See that small LED indicator light? It’s not just there for show. When that little beacon of hope is glowing, it’s a clear signal that your Magic Mouse is charging. No light? No power. It’s as simple as that.
Keep an eye on that light—it’s the fastest way to confirm that your charging efforts are paying off.
Confirming via System Preferences
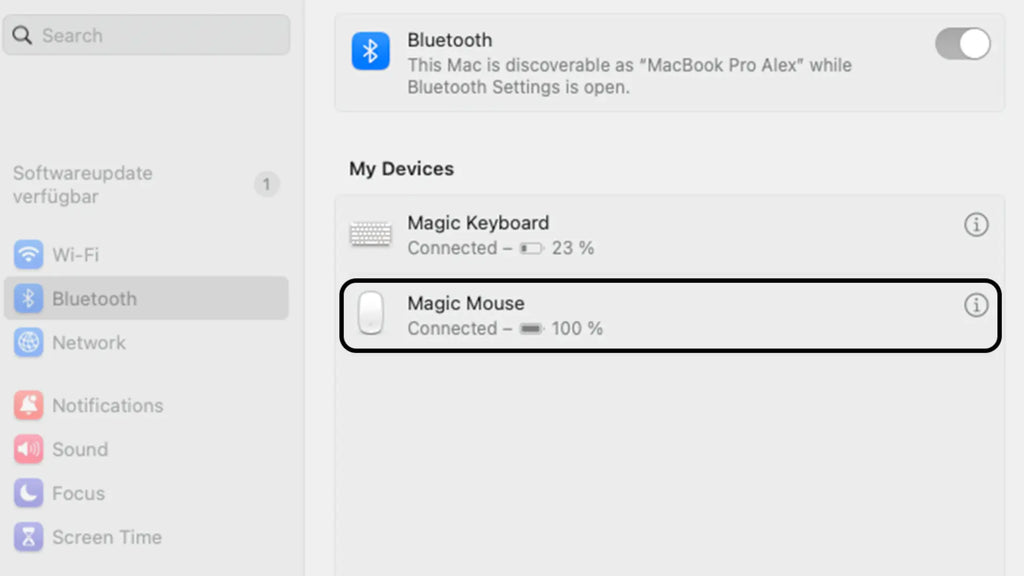
But what if you’re more of a “see it to believe it” person? Well, your Mac has got your back. Head over to System Preferences, where you can check the battery status of your Magic Mouse under the ‘Mouse’ section. It’s a no-brainer spot to see exactly how much juice you’ve got left.
If you’re all about accessibility, there’s also an option to check under ‘Accessibility’, followed by ‘Mouse & Trackpad’ from the left-hand menu. This way, you can confirm your Magic Mouse’s charge level without breaking your workflow stride.
Enhancing Comfort with the Solumics Case
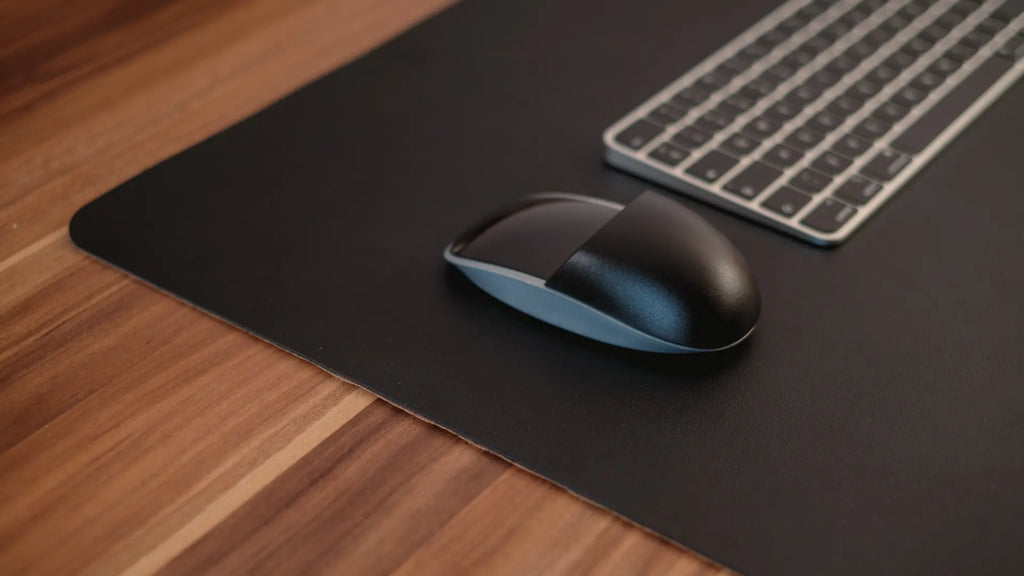
So, your Magic Mouse is charging properly, and you know how to keep tabs on its battery life—great! But what about the comfort factor? Enter the Solumics Case, an ergonomically designed marvel that addresses the sleek but sometimes cramp-inducing shape of the Magic Mouse. It’s a simple addition that promises to transform your interaction with this essential piece of tech. Whether you’re designing the next big thing or crunching spreadsheets, the Solumics Case ensures your hand won’t throw in the towel before your brain does.
Crafted for the Apple Magic Mouse, the Solumics Case is your ticket to a more enjoyable and comfortable mouse experience. It’s not just about aesthetics; this innovative case offers an elevated palm area to reduce hand fatigue, making those long hours of mouse usage a breeze.
We’ll explore in detail the ergonomic benefits of the Solumics Case and how it can revolutionize your work.
Ergonomic Benefits
Picture this: you’re deep into your work, your hand gliding over the mouse with ease, no cramps in sight. That’s the ergonomic dream the Solumics Case brings to life. Its features include:
- Elevated palm area designed to fit the shape of your hand like a glove
- Reduces the strain that a flat Magic Mouse can cause
- Say goodbye to the dreaded hand fatigue that can sneak up after hours of clicking and scrolling
Users are raving about the Solumics Case for the Magic Mouse. Here’s why:
- Comfort: The case provides a more comfortable grip, making your daily grind easier.
- Improved grip: Say goodbye to slipping and sliding. The case ensures a secure grip on your Magic Mouse.
- Functionality: Don’t worry, the case doesn’t compromise the functionality of your mouse. It still works its magic.
It’s a win-win: your hand feels better, and your mouse still works its magic.
Compatibility and Installation
But what if you’ve got the original Magic Mouse Version 1, or maybe the Magic Mouse 2? No sweat—the Solumics Case plays nice with all versions of the Apple Magic Mouse. And don’t even think about breaking out the tool kit; installing this ergonomic wonder is a snap, literally. In less time than it takes to say "abracadabra", or roughly three seconds, your Magic Mouse will be sporting its new comfy attire.
Plus, if you ever want to switch back, it’s just as easy to remove, offering you the flexibility to choose how you work.
A Balanced Approach to Design and Functionality
Now, you might be thinking, “Sure, it’s comfortable, but will it look good on my desk?” Rest assured, the Solumics Case was crafted with design lovers in mind. It complements the Magic Mouse’s iconic look, adding an ergonomic touch without sacrificing style. You won’t have to compromise on gesture controls either—the case is meticulously designed to let you swipe and scroll to your heart’s content.
Embrace the balance of design and functionality with the Solumics Case; it’s the kind of upgrade that feels just right in your hand and looks just as good on your workspace. With this case, you’re not just protecting your Magic Mouse—you’re enhancing your overall computing experience, one click at a time.
Interpreting Battery Indicators on Your Mac
With the Solumics Case, using your Magic Mouse has never felt better. But even the most comfortable mouse is no good if it’s out of power. Now, let’s discuss how to monitor your Magic Mouse’s battery health. Monitoring the battery indicators on your Mac is a key step in preventing any work-stopping surprises. By staying on top of your mouse’s charge level, you can avoid the dreaded complete discharge and bypass overcharging, which can shorten your battery’s lifespan.
Let’s explore the ways to keep those battery levels under control using a battery indicator.
Battery Status in the Menu Bar
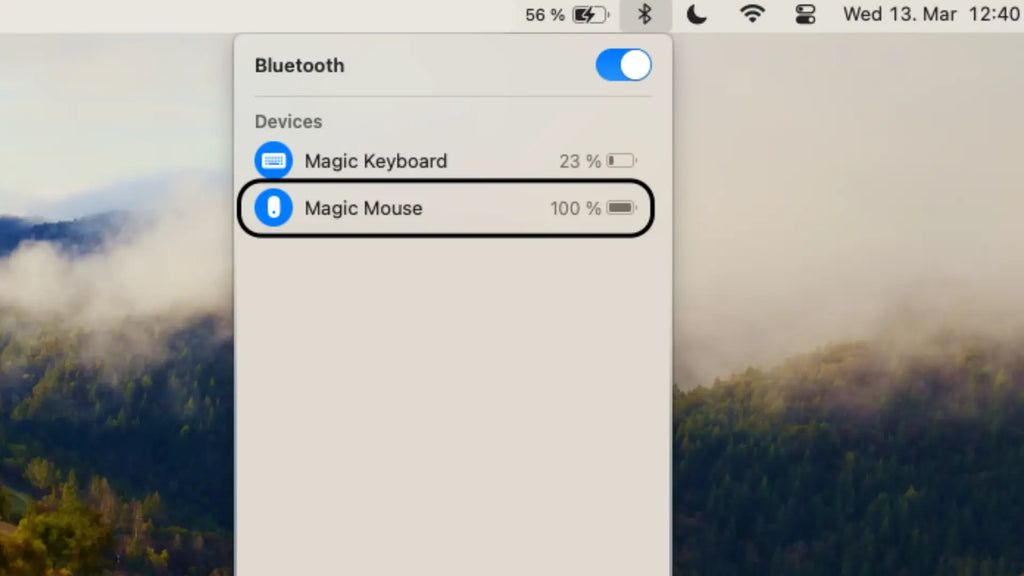
One quick glance at your Mac’s Menu Bar can tell you all you need to know about your Magic Mouse’s battery status. Just make sure your Bluetooth settings are configured to ‘Show in Menu Bar’, and you’re set. That Bluetooth icon isn’t just for connecting new devices—it’s also your gateway to real-time battery updates in the status bar.
Click it, and you’ll see a drop-down list with your connected Magic Mouse and its current charge level. No more guessing if you’ve got enough power to get through your next meeting.
Through the Control Center
If you’re running macOS Catalina or later, you’ve got another tool at your disposal: the Control Center. With a click on the Control Center icon in the menu bar, you can quickly assess your Magic Mouse’s battery status without cluttering your Menu Bar. Just make sure you’ve enabled the Bluetooth battery percentage to be visible through the Control Center settings, and you’re good to go. It’s a sleek way to stay informed and keep your workspace tidy.
Magic Mouse Settings in System Preferences
Prefer the traditional route? No problem. Open up System Preferences on your Mac and select ‘Mouse’ to see your Magic Mouse’s battery level clear as day. It’s an old-school approach that works across all versions of macOS, and sometimes, the classic ways are the best ways.
Whether you’re a minimalist or just like having all your settings in one place, this method has you covered.
Optimizing the Charging Process for Your Magic Mouse
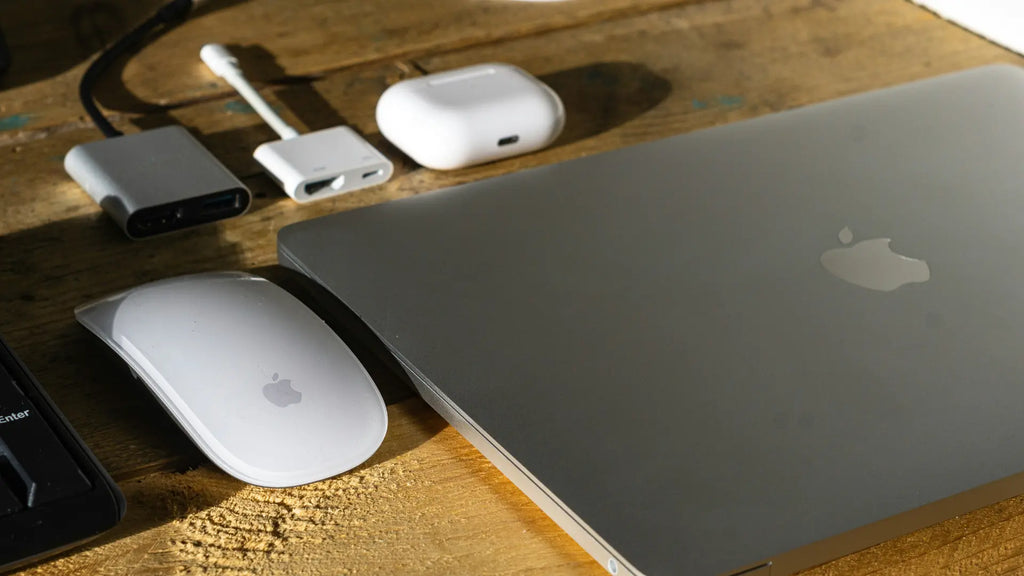
Your Magic Mouse may be comfortable and its battery status clear, but what about the actual charging process? We’ll adjust it for optimum efficiency. The Magic Mouse 2 is equipped with a built-in rechargeable battery for easy and hassle-free charging. This feature is designed to simplify the charging process for users..
Here are some steps you can take to ensure that your Magic Mouse charges efficiently, using the appropriate accessories and adhering to the best practices. For a detailed guide on charging, check out our step-by-step guide on How to charge an Apple Mouse.
Choosing the Right Cable and Port
The secret to a perfect charge? It starts with the cable. Use an Apple-provided USB-C to Lightning Cable or Lightning to USB Cable for the best results. Make sure the cable is firmly connected to the Lightning port on your Magic Mouse for a stable power transfer. And if you’re working with a Mac that only has USB-C ports, grab an adapter to bridge the gap.
It’s all about ensuring a proper connection so your mouse can get the power it needs.
Best Practices for Charging
But even with the right cable, charging your Magic Mouse the right way is crucial for extending its lifespan. Avoid charging in places with extreme temperatures, as they can harm the battery.
And here’s a pro tip: let your Magic Mouse stay turned on while it charges. It might seem counterintuitive, but it actually helps optimize the battery’s charging performance. A little bit of care goes a long way toward keeping your mouse in top shape for the long haul.
Troubleshooting Common Charging Issues
Even with all the right practices, sometimes things just don’t go as planned. If your Magic Mouse is not working properly or stubbornly refusing to charge, don’t panic. There’s usually a straightforward fix, and we’ll walk you through some common troubleshooting steps that can help you get back on track.
Keep in mind, the objective is to quickly identify and rectify the issue so you can resume using your Magic Mouse smoothly.
When the Magic Mouse Won't Charge
What do you do when your Magic Mouse just won’t charge? Start with the basics:
- Check the power outlet or USB port to make sure they’re working.
- If they check out, give your charging port a gentle clean to remove any potential obstructions.
- And sometimes, a simple reset of the Magic Mouse can work wonders—just turn it off and on again.
If you’re still having issues, make sure your Mac’s software is up to date, as this can sometimes affect peripheral device compatibility.
Recognizing Hardware Failures
But what if the problem runs deeper than a simple fix? If your Magic Mouse is still unresponsive after troubleshooting, it might be time to consider a hardware issue. Erratic cursor movement or a complete lack of it can be a red flag for a bigger problem.
If you’ve tried all the tricks and your Magic Mouse is still not cooperating, it’s probably time to seek professional tech support. No one likes admitting defeat, but sometimes bringing in the experts is the smart move.
Summary
And there you have it—everything you need to keep your Magic Mouse charged, comfortable, and ready for action. From identifying the charging status to optimizing the charging process and troubleshooting issues, you’re now equipped to handle whatever comes your way. Pair your mouse with the Solumics Case, and you’ll not only boost your comfort but also your productivity. Remember, taking care of your Magic Mouse is taking care of your workflow. Keep these tips in mind, and you’ll be clicking your way to success in no time.
Frequently Asked Questions
To determine if your Magic Mouse is actively charging, simply glance at the battery indicator located on the status bar of your Mac. This indicator provides a real-time display of the current battery percentage of your Magic Mouse, allowing you to confirm that it's successfully receiving power.
The Magic Mouse takes about 2 hours to fully charge and can last several weeks once fully charged. It has a built-in rechargeable battery, and you can conveniently monitor its charge level through the battery status icon in the menu bar.
You should keep your Magic Mouse on while charging for the fastest battery charging performance.
The Solumics Case is an ergonomic accessory for the Magic Mouse that enhances comfort with an elevated palm area, reducing hand fatigue while maintaining the mouse's functionality and design.
Yes, you can easily check your Magic Mouse's battery status by clicking the Bluetooth icon in the macOS Menu Bar or using the Control Center in macOS Catalina or later.

